Create a work order using the circle tool
This method of creating a work order is almost identical to creating a work order using the polygon tool, except this time you draw a circle.
Step 1: Draw the circle to capture the assets
- Zoom and pan the map to the relevant area where your assets are located.
- Select the circle tool
 .
. -
Click on the location in the map you want to be the center of your circle and (while holding the mouse button down) drag to increase the radius of the circle. When you release the mouse, the following options appear:
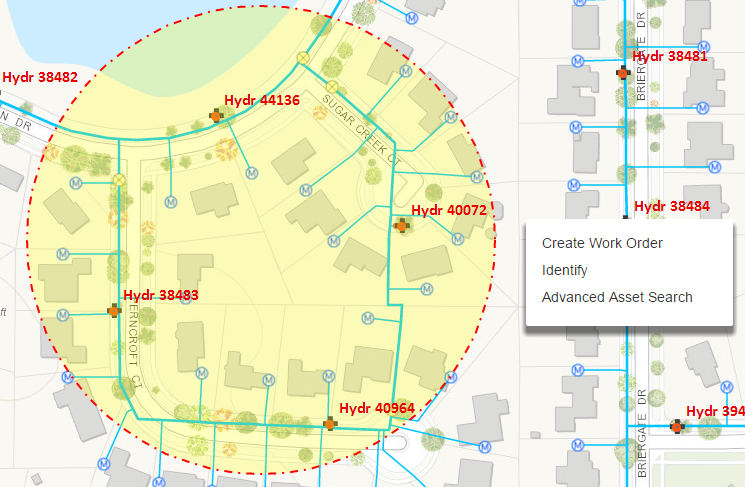
- Clicking Identify shows the select assets where you can quickly filter assets based on type before including them on a work order.
- Clicking Create Work Order takes you to the stage of completing the other work order details (as in Step 2 of Create a simple work order with no assets. However, in drawing the polygon you may have selected some assets that you don’t want to be part of the work order. In this case, you can either click Identify or Advanced Asset Search to refine the list of assets in the work order:
- Clicking Advanced Asset Search enables you to search for assets within the drawn shape, so you can for example, search for all 12-inch, Gate Valves that are Opened and Installed prior to 1980. You can then show the selection on the map and include them on a work order. For more information, see Advanced Search.
- Assets selected are shown in the list. Click Identify.
From this point, the work order creation process is identical to step 2 of Create a work order using the polygon tool.