Configure Remote Monitoring for Telog Enterprise RMTE Licenses
RMTE stands for Remote Monitoring for Telog Enterprise and is issued to users that utilize an on-premises installation of Telog Enterprise, which includes one or more Telog databases. If you utilize a single database, there is no additional configuration required. However, if you maintain two or more Telog databases that you also wish to access from Trimble Unity Remote Monitoring, the following documentation will guide you through the setup and configuration procedure.
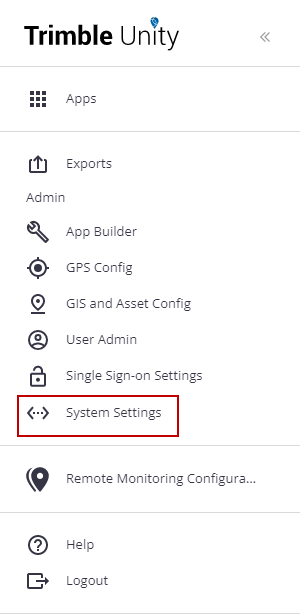
You will need to enable the RMTE function in System Settings.
|
|
 PREREQUISITES:
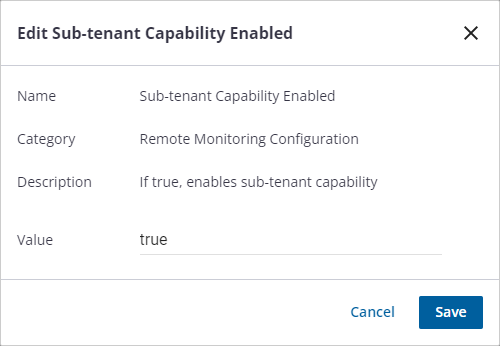
- Click System Settings in the menu.

- Click the Edit icon next to Sub-tenant Capability Enabled.
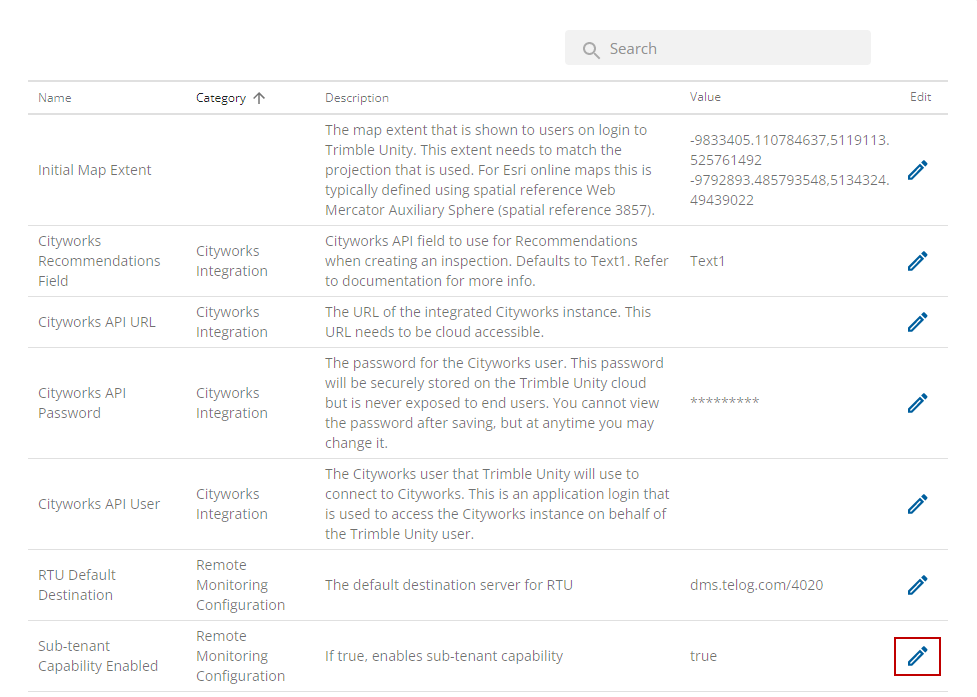
- Enter true in the Value field and click Save.
The Telog API must be installed on an Microsoft IIS server that is accessible by all users of Trimble Unity Remote Monitoring through a secure web URL. If you intend to use Unity outside of the cooperate network, the URL needs to be publicly accessible.
|
|
- Click System Settings in the menu.
- Click the Edit icon next to Telog API URL.
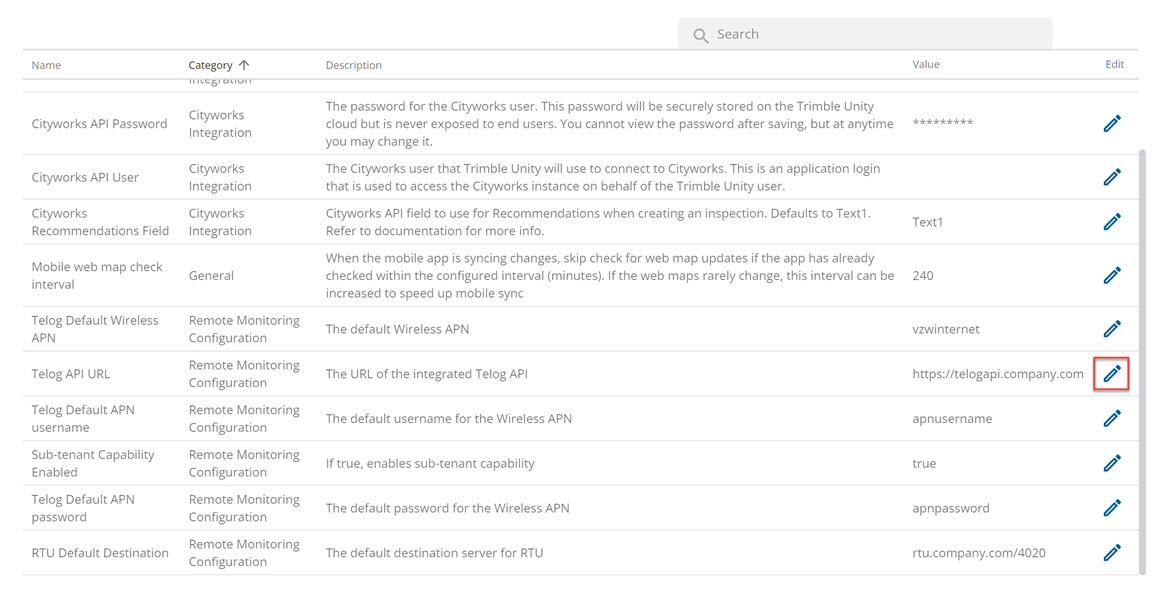
- Enter the full URL in the Value field and click Save.
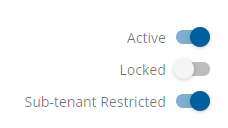
Once the sub-tenant capability is enabled, the User Admin page will show an additional option, Sub-tenant Restricted. This setting should be applied to all user logins that will be given limited access to Remote Monitoring apps. If this option is selected, users will not have access to work orders and will not be allowed to be a system administrator.
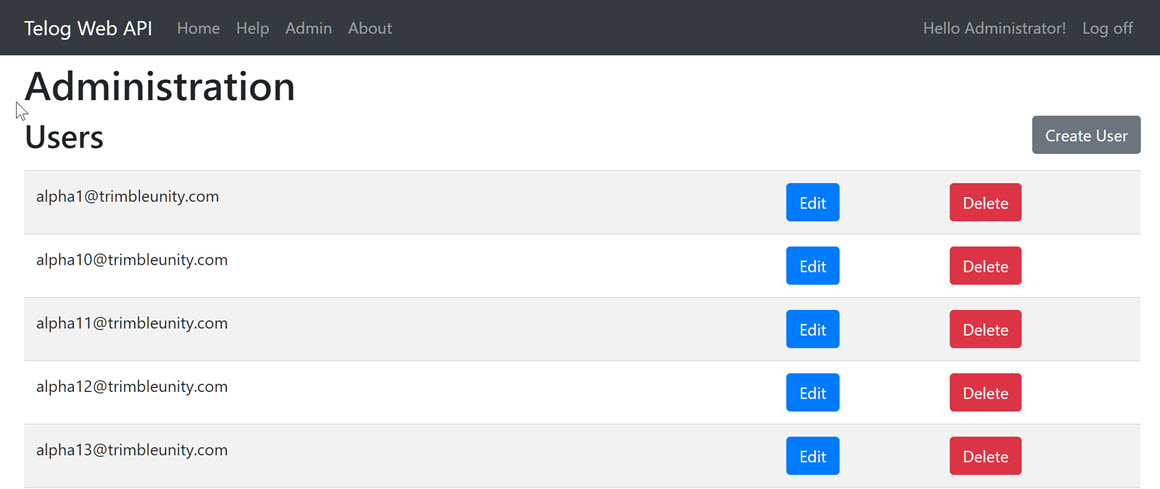
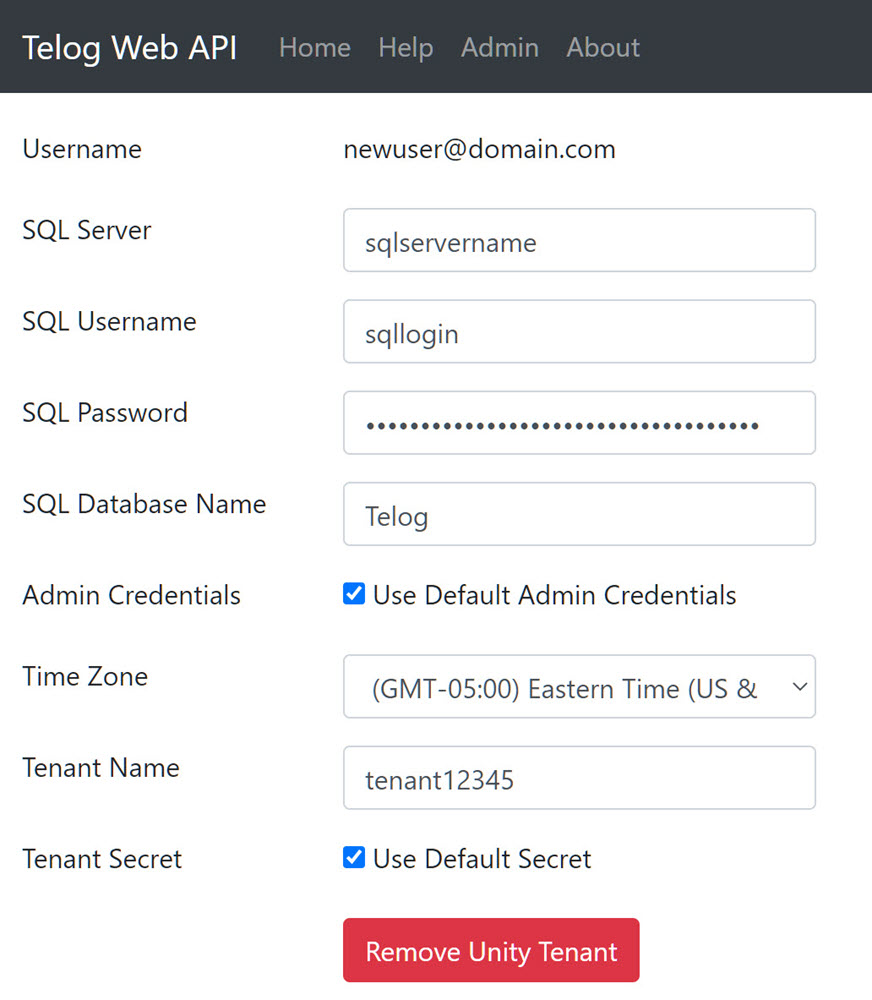
You will need to create a new Telog API account for each of the Telog databases you manage.
- Log in to the Telog API using the admin credentials created when it was installed. If you don't have the credentials, contact your IT resources or Trimble support for assistance.
- Click Admin at the top of the page to view the user account administration.
- Click Create User to create an account for your Telog database. You will need to create an account for each database that you deploy.
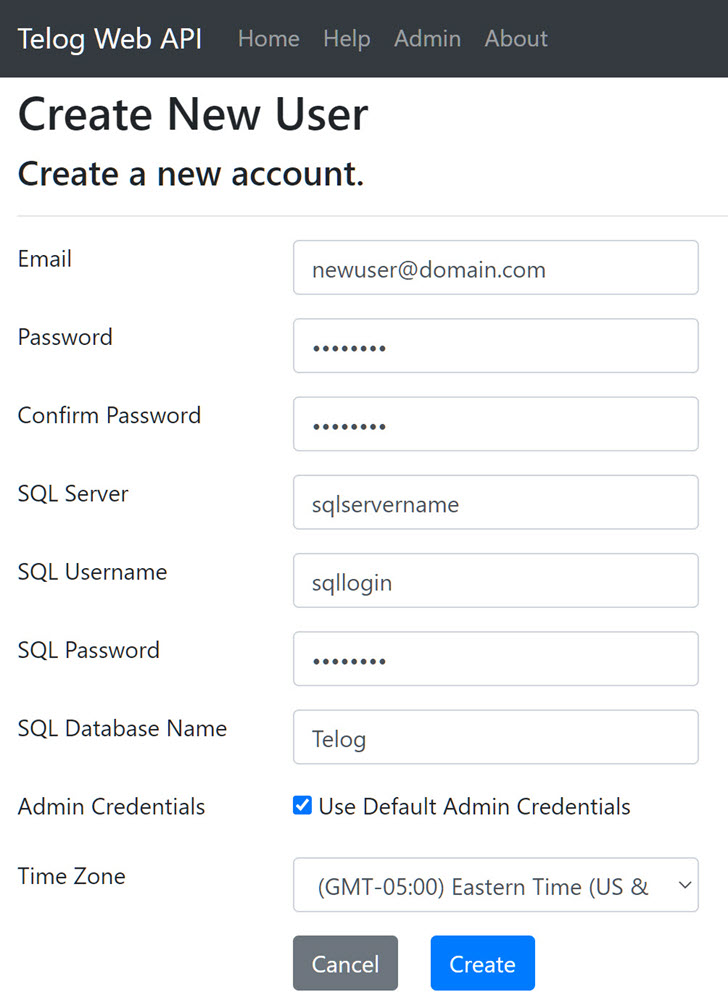
- Enter the following information for the user:
- Email: Enter the email address for this user. This is also the account login.
- Password: Enter a password for this user.
- Confirm Password: Confirm the password that you entered.
- SQL Server: Enter the name of your SQL Server instance.
- SQL Username: Enter your SQL username.
- SQL Password: Enter your SQL password.
- SQL Database Name: Enter the name of your SQL database.
- Admin Credentials: If desired, select Use Default Admin Credentials.
- Time Zone: Select your time zone.
- Click Create to create the account.
The SQL credentials and database are verified during the creation of the user.
- Find the new user account and click Edit to enter the Unity tenant identifier.

- If the Telog API is configured with a default tenant ID, the tenant field is populated with this value. If it is not populated, enter your tenant ID. Each organization is assigned a unique tenant ID.
- Select Use Default Secret to use the default tenant secret, which was also configured during the API installation and setup.
- Click Save Changes.
The Telog API account is now ready to use with Trimble Unity Remote Monitoring as long as the database name entered in the Remote Monitoring app matches the database name entered in the Telog API account.
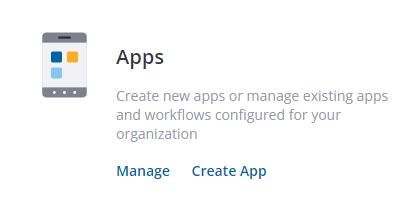
You will need to create a new Remote Monitoring app for use with RMTE. Each app is linked to a Telog database. So if you have five databases representing five projects, you can create five Trimble Unity Remote Monitoring apps and control access permissions and GIS configurations for each individually.
|
|
- Click App Builder from the menu.
- On the Apps panel, click Create App.
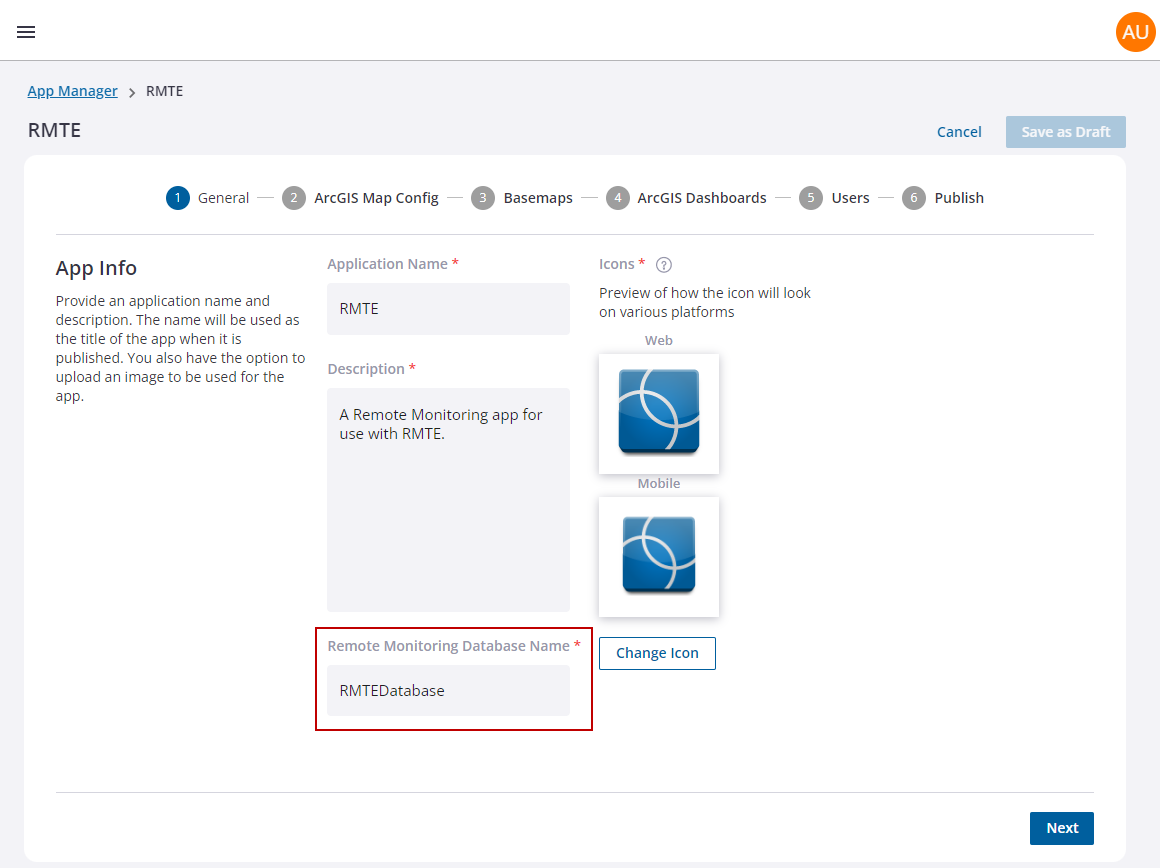
- On the General tab, enter the Application Name and add a Description of the app.
- Click Change Icon to change the icon you want to use for the app.
 NOTE: If you change the image for the icon, it must meet these requirements:
- .png image
- 90 x 90 pixel
- 1 MB or less in size
- Transparent background
- Enter the name of the Telog database.
- To configure the app with Esri ArcGIS data, see Configure the Trimble Unity Remote Monitoring App with GIS Data.
You will need to assign users to this app. You can either select the users during step 5 of creating the app, or you can assign the app from the user's account.
- To assign users to this app during the creation process, select the desired Users.
 IMPORTANT: Be sure to give yourself access to the new app at this point, otherwise you won't be able to complete the configuration.
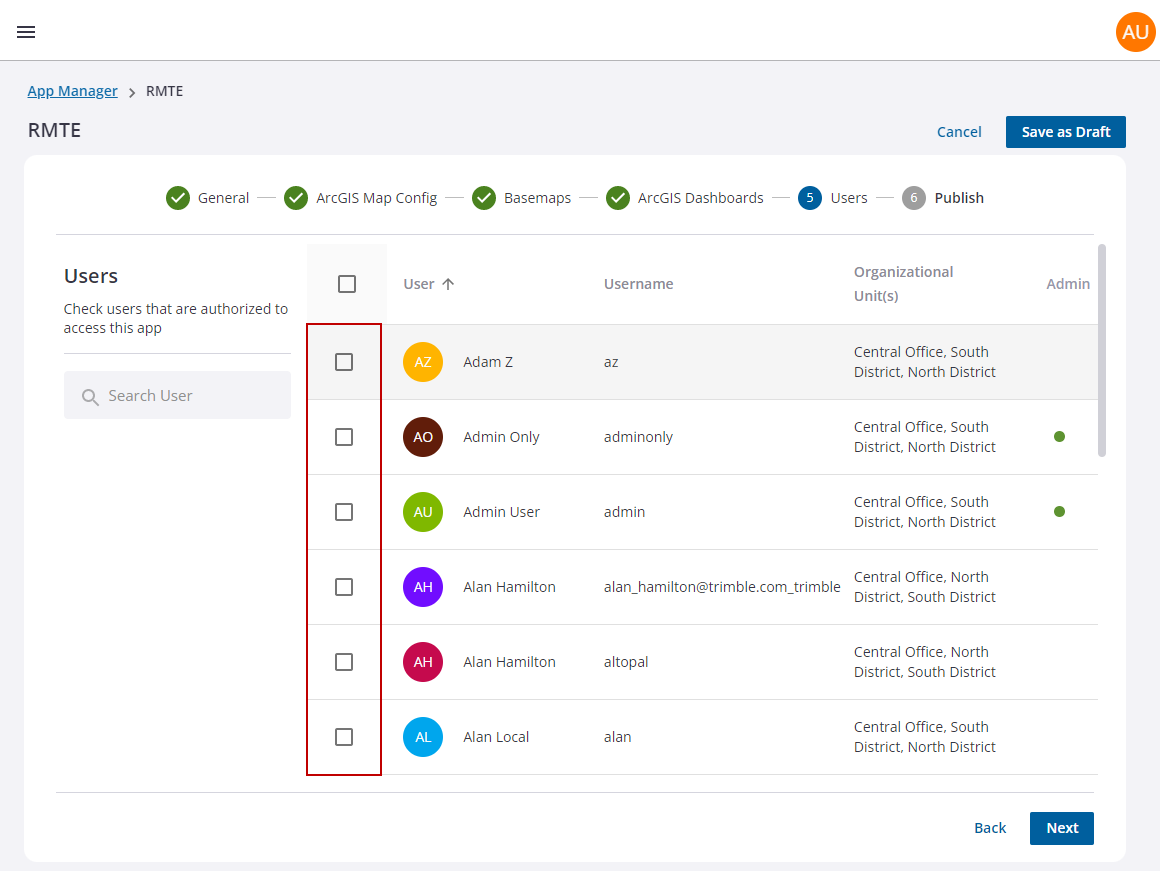
- To assign this app to users once it has been created, navigate to User Admin and add the app under App Access. See Manage User Accounts for more information.
All the updates and changes made in the app are now ready to publish.
NOTE: If the ArcGIS web map associated to a published Trimble Unity app is updated to include additional GIS layers, the app in Trimble Unity needs to be republished by editing the app and clicking Publish.
NOTE: Click Save as Draft to save any changes to the new app without publishing. This allows you to return to finish building the app at any time.
- Click Publish.
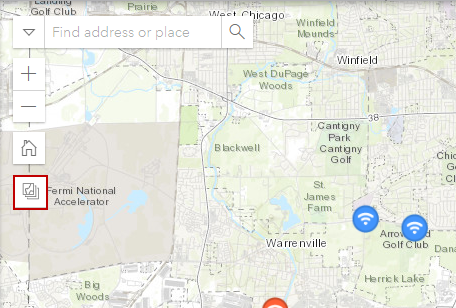
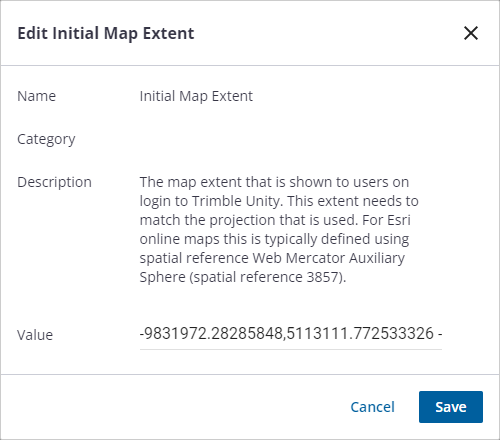
System administrators can set the initial map extent for Remote Monitoring users. If you are using an Esri ArcGIS web map in the Remote Monitoring app, then the app will take the initial map extent from the web map configurations, otherwise the app will use the default map extent set in System Settings.
|
|
- Navigate to the desired map extent using the map navigation tools.
- Click the Copy map extent to clipboard icon.
- Click System Settings in the menu.
- Click the Edit icon next to Initial Map Extent.
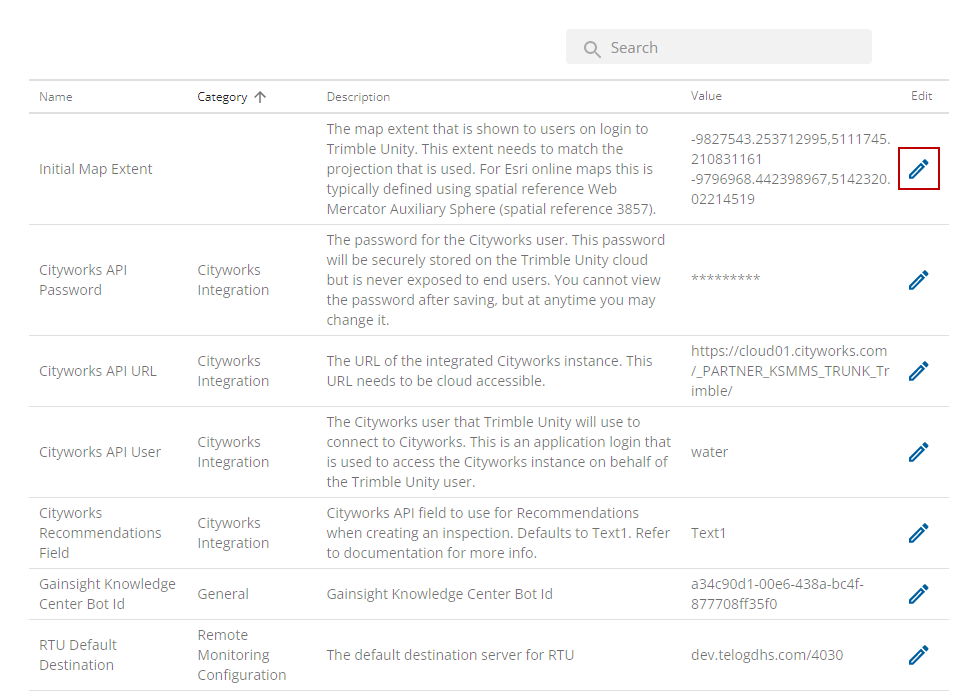
- Paste the map extent value in the Value field and click Save.
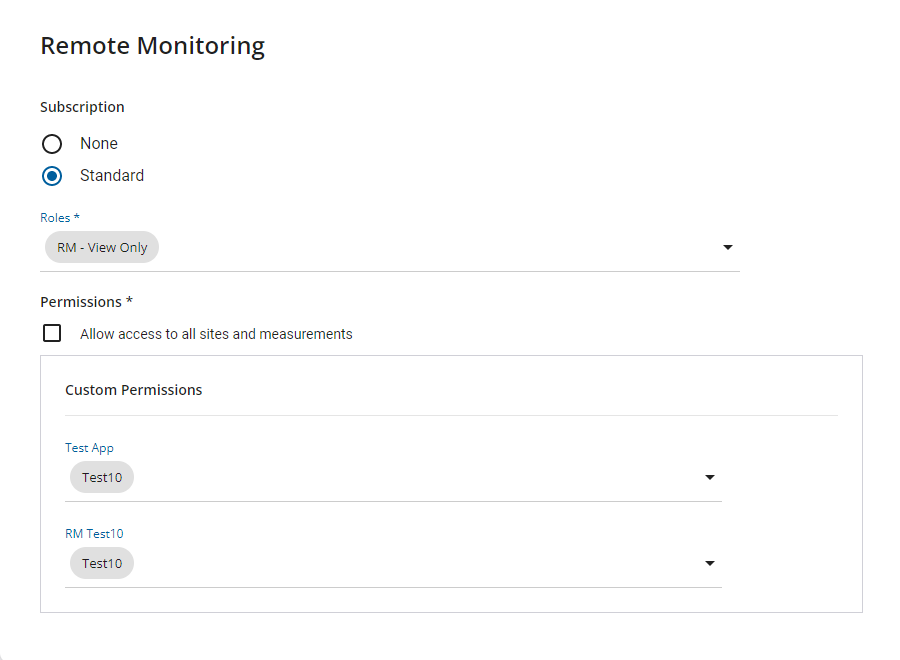
You can give users access to the app and control what they have access to within the app. Be aware that roles are shared across all Remote Monitoring apps; however, a user may have different permissions assigned to each.
- Create a site group for the users who need access to RMTE. See Create and Manage Monitoring Site Groups for more information.
- Create a permission policy for the site group. See Create and Manage Permission Policies for more information.
- If you haven't assigned the users to the app yet, navigate to User Admin and add the app under App Access. See Manage User Accounts for more information.
Roles are shared across all Remote Monitoring apps, but if a user has access to multiple apps you can select different permission policies for each app. If you select Allow access to all sites and measurements, that applies to all apps that the user has access to.