Manage User Accounts
The users page allows you to add new users and manage existing users.
|
|
 PREREQUISITES:
- Click the menu icon to open the menu.

- Click User Admin.
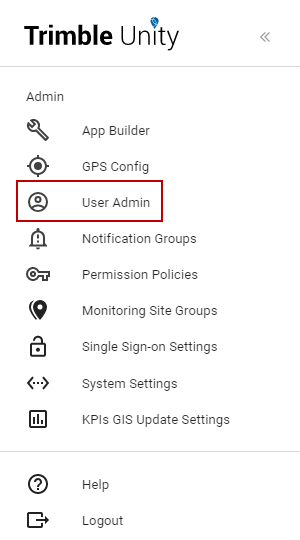
The User Admin page opens. From here you can manage users, groups, and organization units as well as view subscriptions.
- Click Users, if needed.
The existing users are shown, as well as the licenses assigned to them. You can search for a user by typing in the search field at the top of the list, or you can filter users based on their licenses and status.
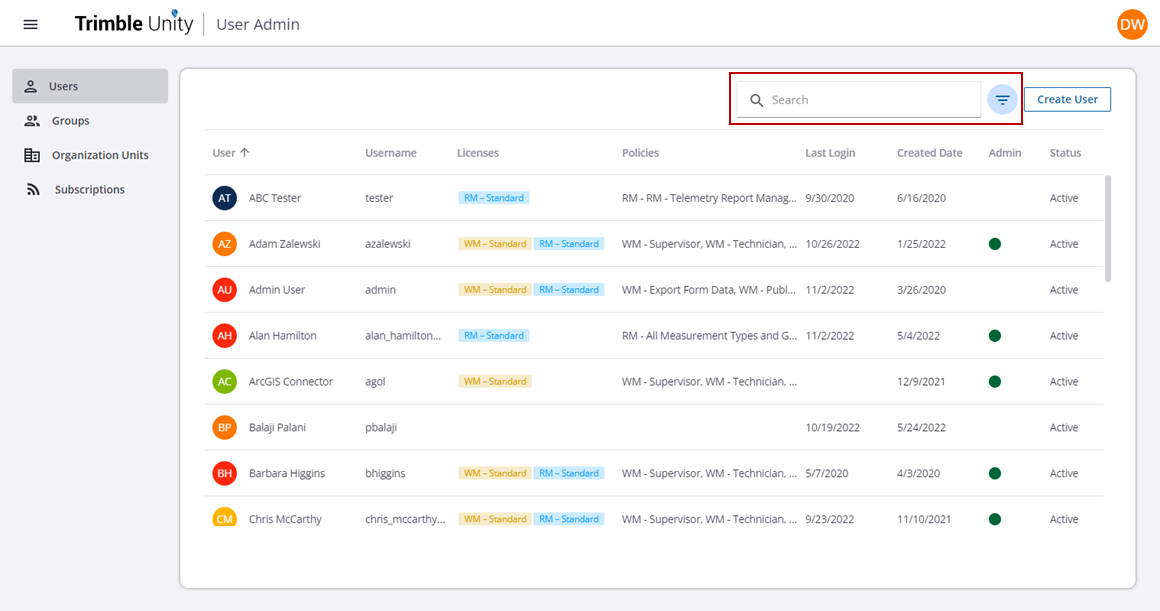
 NOTE: You can view the active organization's subscriptions from the Subscriptions tab. See View Subscriptions for more information.
- To edit an existing user, click the user and make the desired changes.
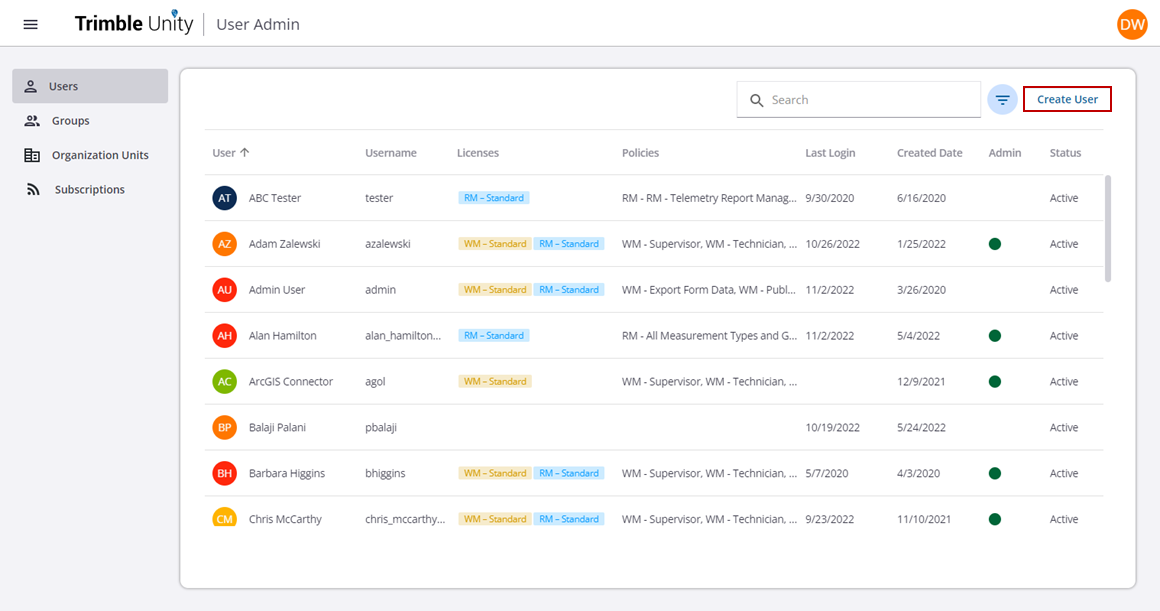
- To add a new user, click Create User.
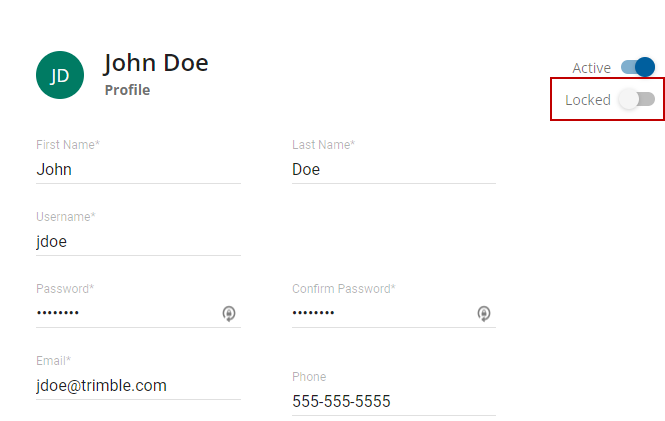
- In the Profile section, enter the new user's first and last name, username, password, email, and phone number. Note that this password is temporary.
NOTE: Users have the ability to log in with ArcGIS Identity as long as the username matches their ArcGIS Online ID and authenticates the user to access the apps based on the permissions they are given. See Single Sign-on Settings for more information.
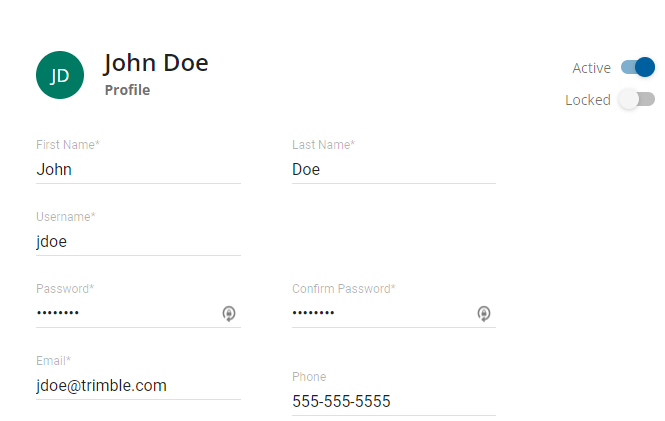
NOTE: The phone number is visible as contact information when assigning a work order.
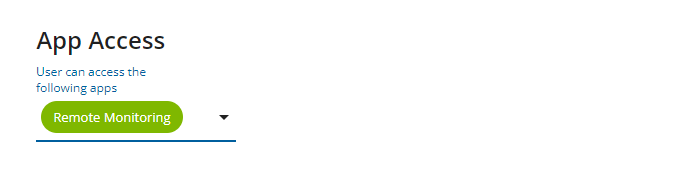
- In the App Access section, select the apps you want the user to have access to. The list will display the list of all the apps configured for your organization.
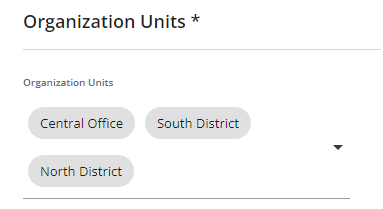
- In the Organization Units section, select the locations for this user. There are three predefined locations and we recommend that you select all of them to allow all users to see each other's work. Additional units can be created and added to a user. See Configure Organization Units for more information.
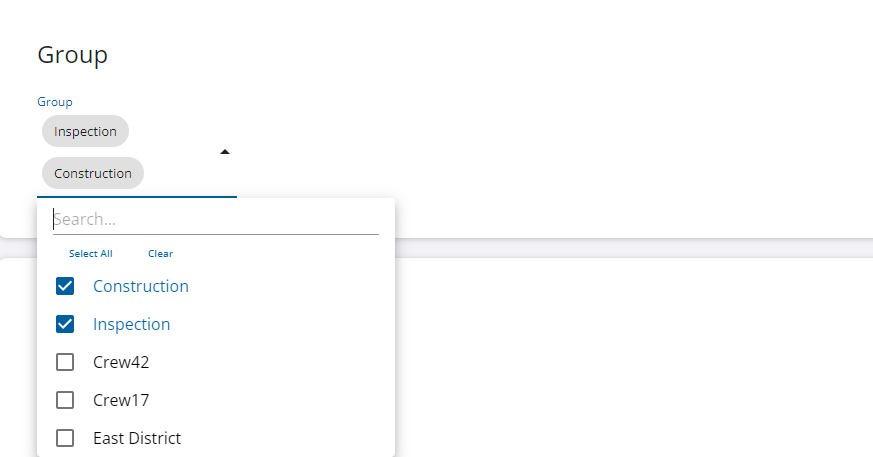
- In the Group section, select the check box next to any groups you want to add the user to. See Configure Groups for more information on how to create a group.
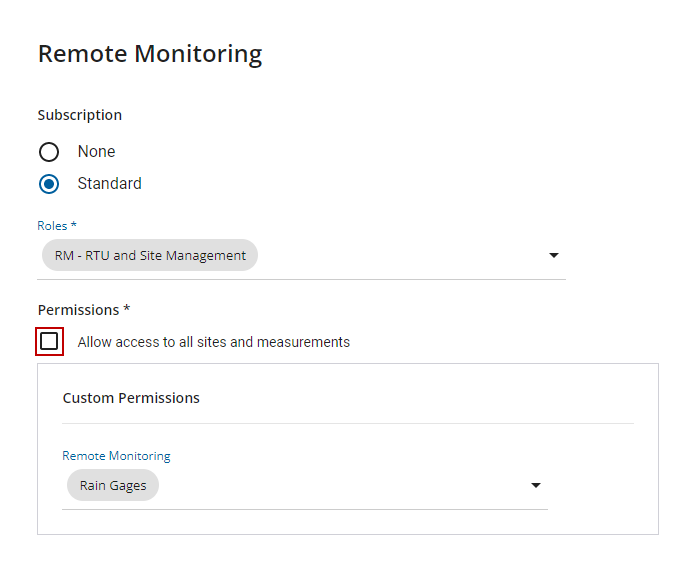
- In the Remote Monitoring section, select Standard if this user should have a Remote Monitoring subscription. Select the desired Roles for this user.
- RM - View Only: Allows the user to view measurements, run reports, and view and export data.
- RM - Telemetry Report Management: Allows the user to run, create, edit, and delete saved telemetry reports.
- RM - RTU and Site Management: Allows the user to install RTUs, create sites, change the RTU configuration, edit site details (properties), and activate KPIs on sites, as well as create monitoring site groups, notification groups, and recipients.
NOTE: If the RM - RTU and Site Management role is not assigned to the user, then the user cannot see RTUs and any information related to RTUs configured on a site.
- RM - Telemetry Annotation: Allows the user to notate points in the data where significant events may have occurred.
- RM - Telemetry Data Editing: Allows the user to edit measurement data points to correct data. This is supported only on calculated measurements created through Telog Enterprise.
- RM - Trend Data Import: Allows the user to write trend data using the Telog API if the account is also licensed to import sites. It must be selected for any user that needs to be able to access the Telog API to import trend data. See Import Site Data Using the Trimble Unity Remote Monitoring Historian API for more information.
- All Measurement Types and Groups: Allows the user access to view all sites and all measurements within those sites.
- Select the desired Permissions for this user. If you want to limit the user from accessing certain sites, see Create and Manage Permission Policies to learn how to create custom site measurement access policies.
- Select the Allow access to all sites and measurements check box to give all existing permissions to the user.
- In the System Access section, select Administrator if this user should be an administrator. A user with the administrator role will have access to all functionality within Trimble Unity, including User Admin and setting up permission policies, notification groups, and system settings.

- Click Save.
If a user fails to log in successfully, they are locked out. When that happens, an administrator must edit the user and click the Locked toggle switch to unlock the user. The administrator can also update the user's password or deactivate the user by clicking the Active option.
|
|
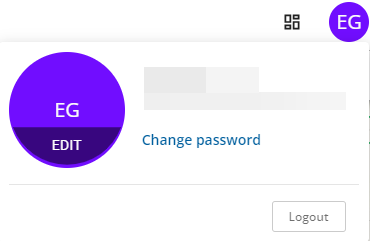
 TIP: You can change your password at any time by clicking your user icon in the upper-right corner of the page, then clicking Change password. Follow the steps to update your password.