Install an RTU on a New Site Using the Web App
An RTU can be installed on a new monitoring site using the Trimble Unity web app.
|
|
 PREREQUISITES:
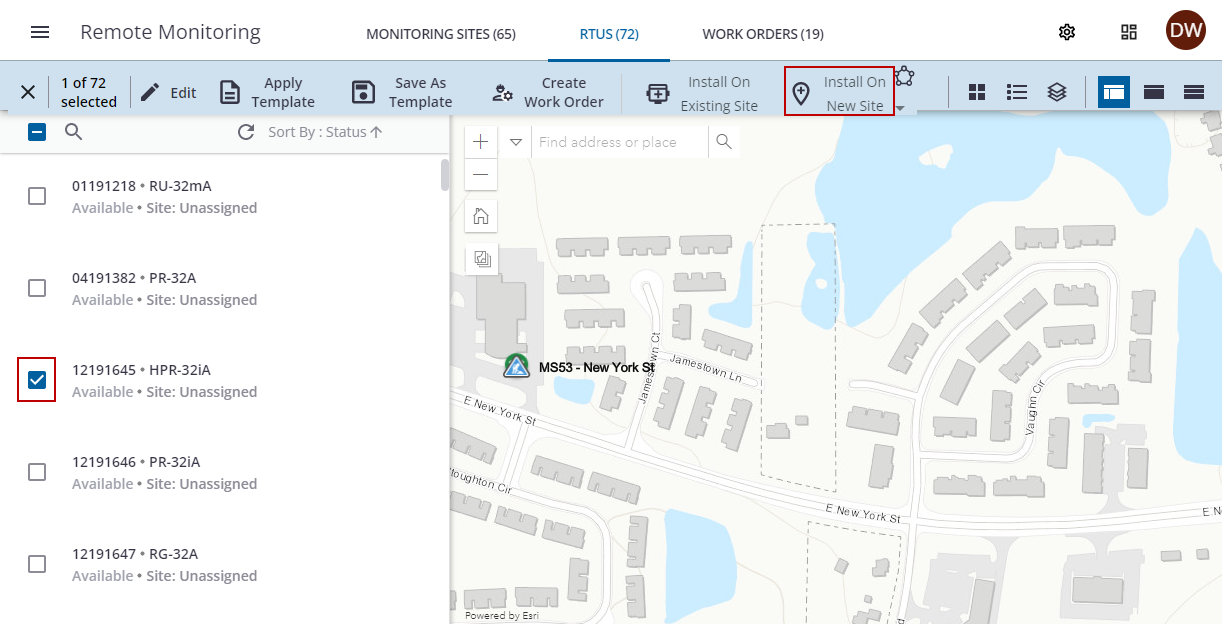
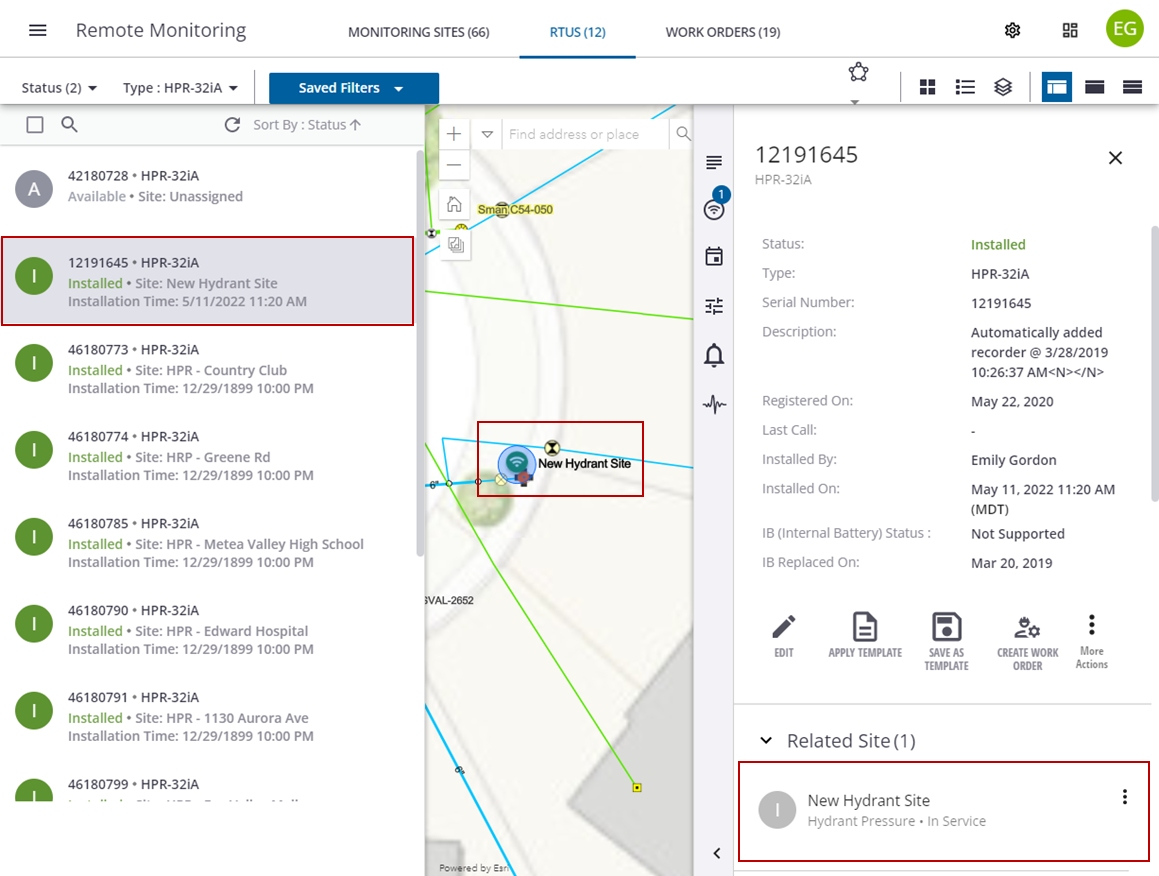
- Click the RTU you want to install from the RTU list.
- Click Install on New Site on the RTU details panel.
- Alternatively, select the check box for the RTU and click Install on New Site on the top menu.
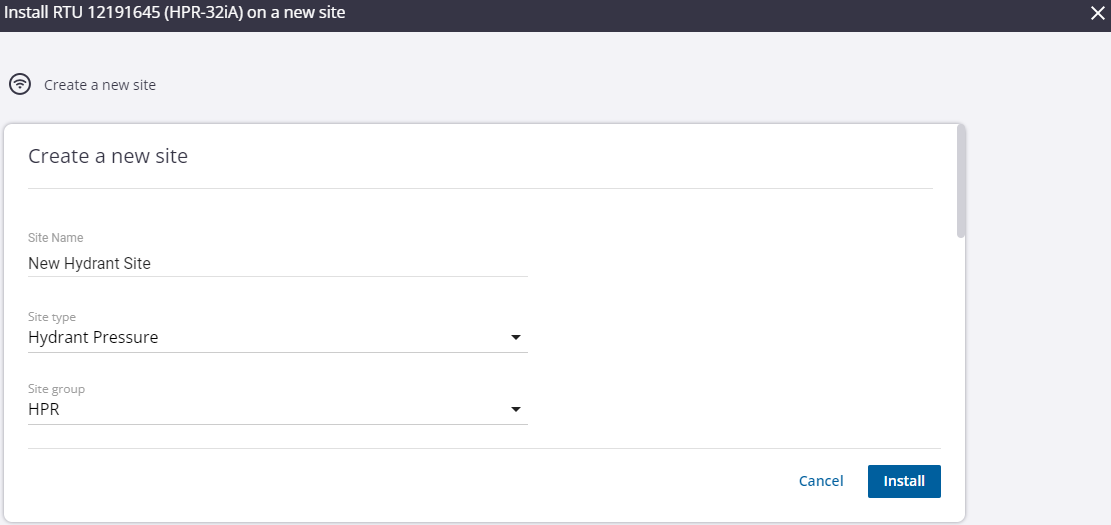
- In the Create a new site section, enter the Site Name, select a Site type, and select a Site group.
 NOTE: The site type is determined by the RTU type, and creates specific reports, measurements, and data points for that site type.
- Click Select from Map to zoom to and select the location of the new site on the map.
- Alternatively, enter an address in the search bar to find and select the location on the map.
- Click Use Location.
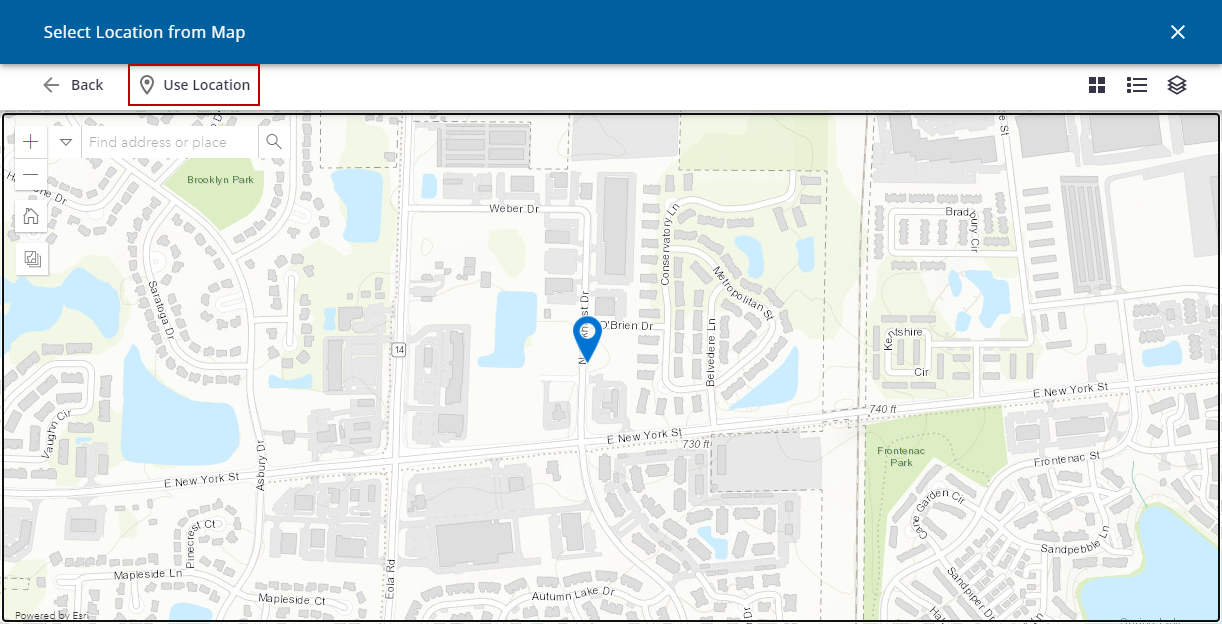
The location coordinates are added for the new site.
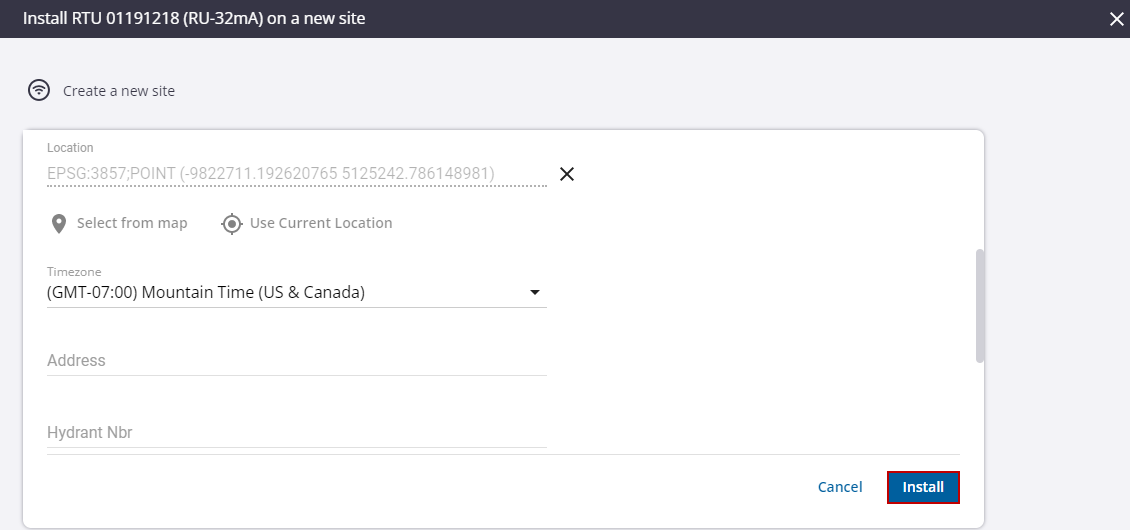
- Click Use Current Location to use your current location as the location of the new site.
- Select a Timezone from the drop-down list.
- Enter any data you want in the Custom Fields.
- Click Install.
The selected RTU status changes to Installed, and the new site shows on the map.
 BEST PRACTICE: It is a best practice to tamper an RTU after every installation to confirm communications and data transfer. See Tamper an RTU to Force a Test Call for more information.
- Click the new site under Related Site on the RTU details panel to open the site details.
NOTE: Some of the information listed on the RTU details panel will populate once the RTU calls in for the first time. For example, last call, internal battery status, measurements, etc.