Create and Manage Workflow Templates
You can create and manage workflow templates that are used in the Trimble Unity work management apps. The workflow templates represent your existing business processes for assigning and managing field work activities. This topic outlines how to create work order-level or asset-level workflow templates.
|
|
 PREREQUISITES:
You can create and manage a workflow template for work order-level workflows that can be used when building apps in Trimble Unity to meet your specific work process.
 TIP: See the How to Create a Work Order-Level Workflow Template in Trimble Unity on the Trimble Water community site for a video demonstrating how to create a work order-level workflow.
- Open the menu.

- Select App Builder.
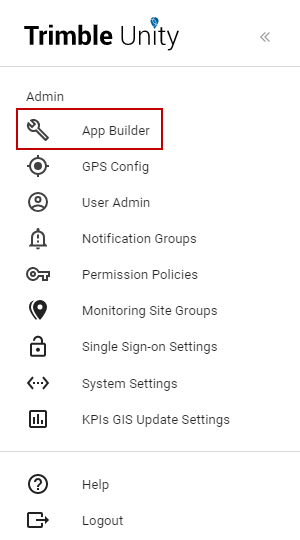
- Select Create Workflow Template in the Workflow Templates section.
 NOTE: If you want to update an existing template, click Manage. From the Workflow Templates page, find the template you want to edit, click the vertical three dots, and click Edit.
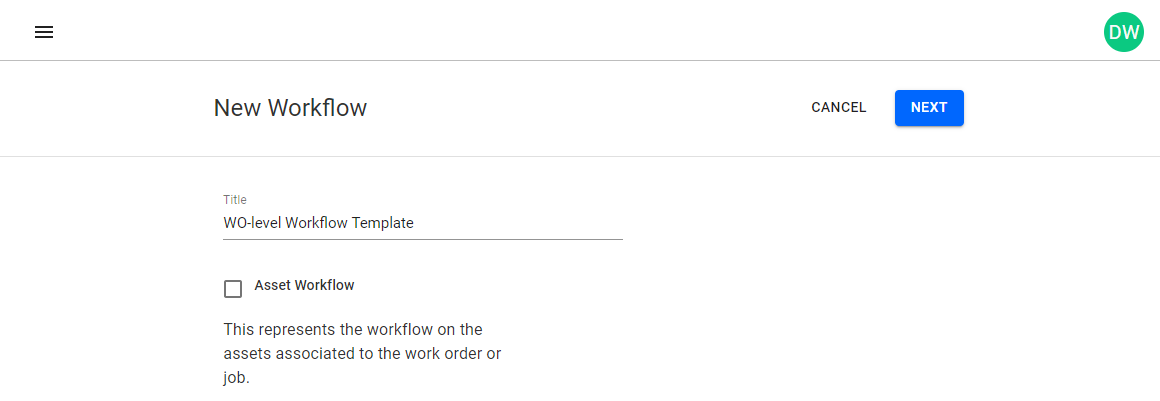
The New Workflow page opens.
- Enter a name for the template in the Title field.
- Since you want to associate a work order-level template with a work order, make sure the Asset Workflow check box is cleared.
- Click Next.
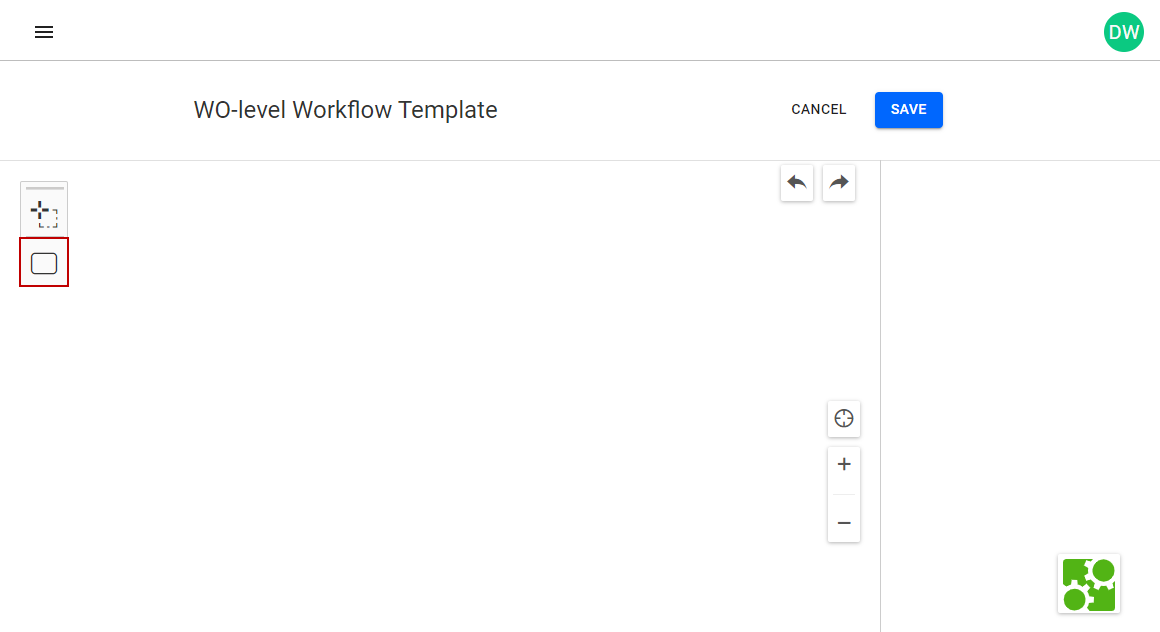
The next page allows you to build out the workflow by drawing the workflow process and progression on a canvas.
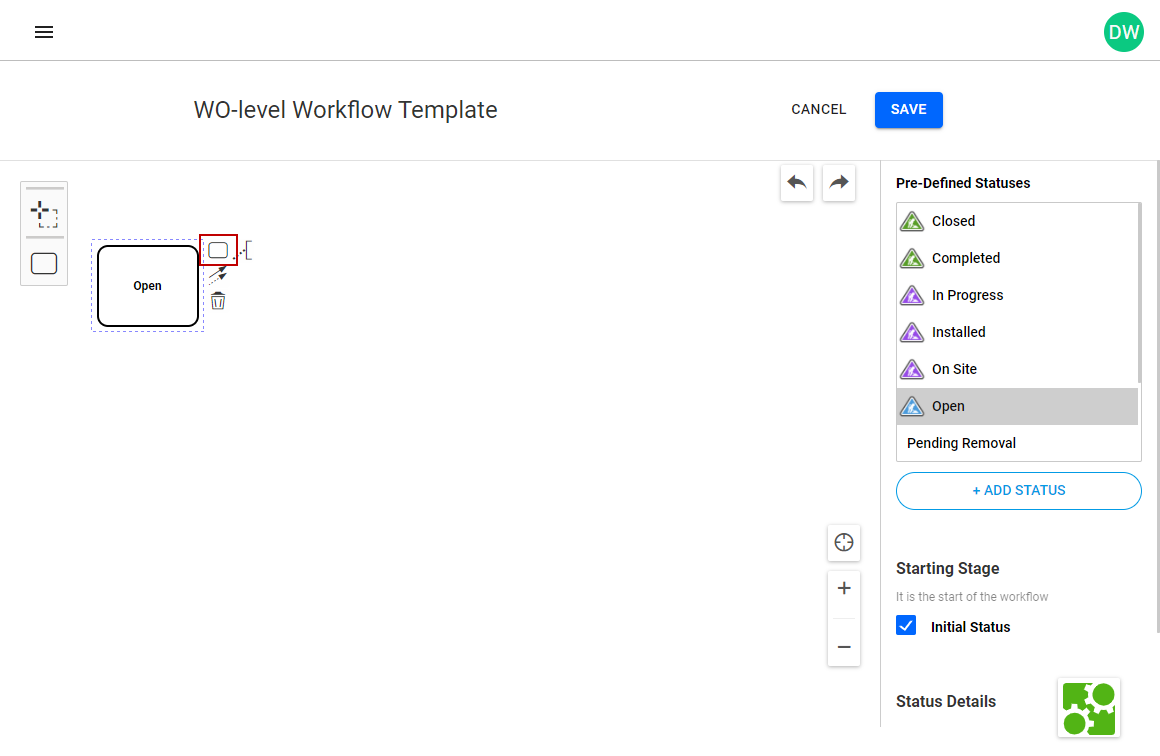
- Click Add Status from the menu on the left to add a box to the canvas.
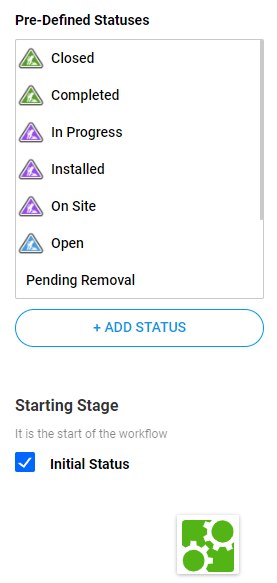
- Provide a name for the status by selecting the status box you added and selecting a status from the Pre-Defined Statuses panel.
- If the status you want already exists, select it.
- If the status you want is not in the list, click Add Status. Fill out the New Status panel as needed and click Save.
NOTE: If you add a new status, make sure to select an icon from the Map Icon drop-down list to denote the status on the map. If Closing Stage is selected, then the work order stops when this status is selected.
Selecting a status updates the status box on the canvas with the name of the status. You can add follow up statuses that allows the workflow template to progress from the beginning of the workflow to the end. You can add additional statuses using different tools shown in the following screenshot.
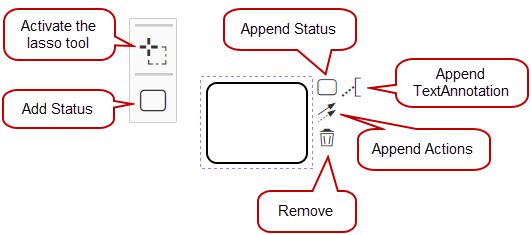
- Add Status: Click to add a new status box.
- Append Status: Click to create a new status box and connecting to the previous status box, which shows the workflow's progression.
- Append TextAnnotation: Click to attach text that explains the status.
- Append Actions: Click to connect the status box to another status box. This is especially useful if you used Add Status to create a status box and need to create a connection with another status box.
- Remove: Click to remove the status box, connections, or text annotations from the workflow.
- Activate the lasso tool: Click to select a group of statuses, connections, and/or text annotations and move them around on the canvas.
The easiest way to add statuses and connections between existing statuses in the workflow is to use Append Status.
- Click or click and drag Append Status on the existing status box to create a new status box. An arrow appears between the statuses and shows the workflow progression path.
TIP: When you click and drag, you can decide how much space is between the status boxes. However, if you just click Append Status, you can click an drag the new status box to change the default space between the status boxes.
- Provide a name for the status by selecting the status box you added and selecting a status from the Pre-Defined Statuses panel.
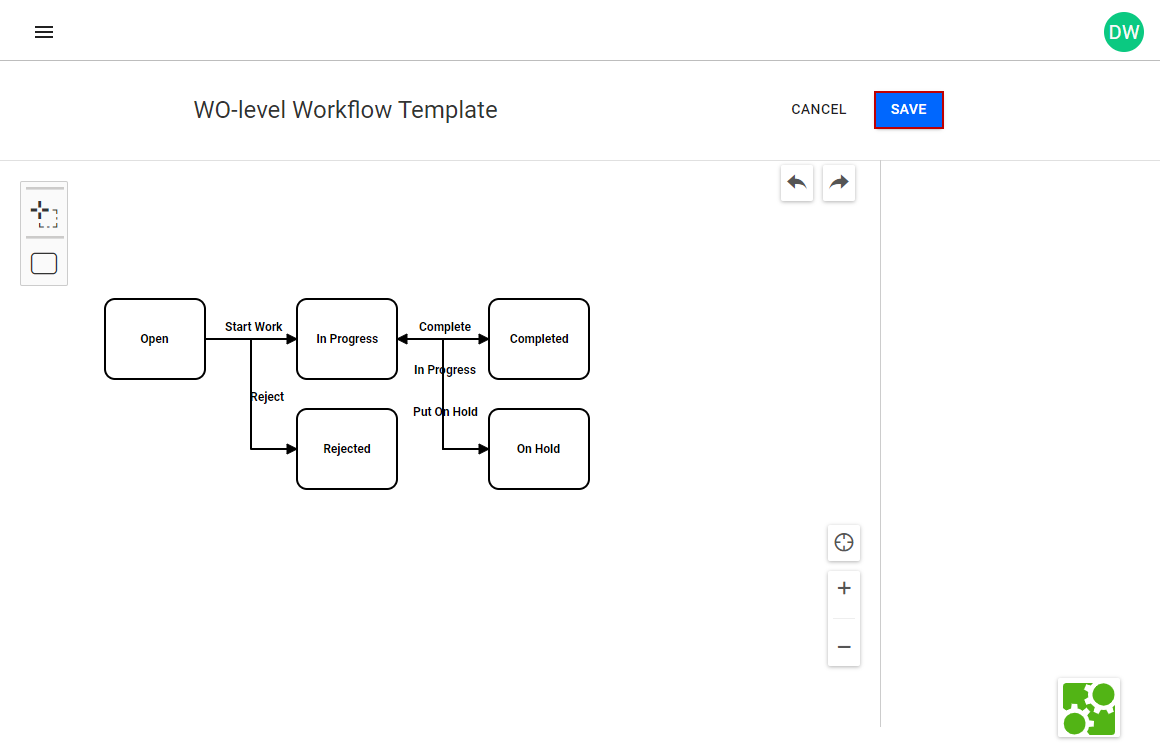
Once you have finished building the basic status workflow, you can add the names of the actions. The actions are what appear on the mobile and web interface as buttons, which are selected to trigger the transition from one status to the next status. For example, the action to trigger the status Reject would be Reject.
- Select the arrow between statuses.
- Select where the action is Visible From, such as the Office, Field, or Both (Office and Field).
NOTE: If an option is not selected for Visible From, a warning message appears when you click Save and notifies you that actions must be visible.
- Enter the Action Name.
The action name appears as a label on the arrow. You may need to adjust the location of the label to make it more readable.
TIP: The Action Name is displayed to web and mobile users and used to progress the workflow from one status to another based on the workflow template. These actions can also be associated with Data Collection forms that are triggered when users click these actions from the mobile apps.

- Repeat the previous steps for all the arrows in the workflow.
- Once you've completed adding the actions, click Save.
- A success message appears. Click OK.
The new workflow template appears in the list on the Workflow Templates page.
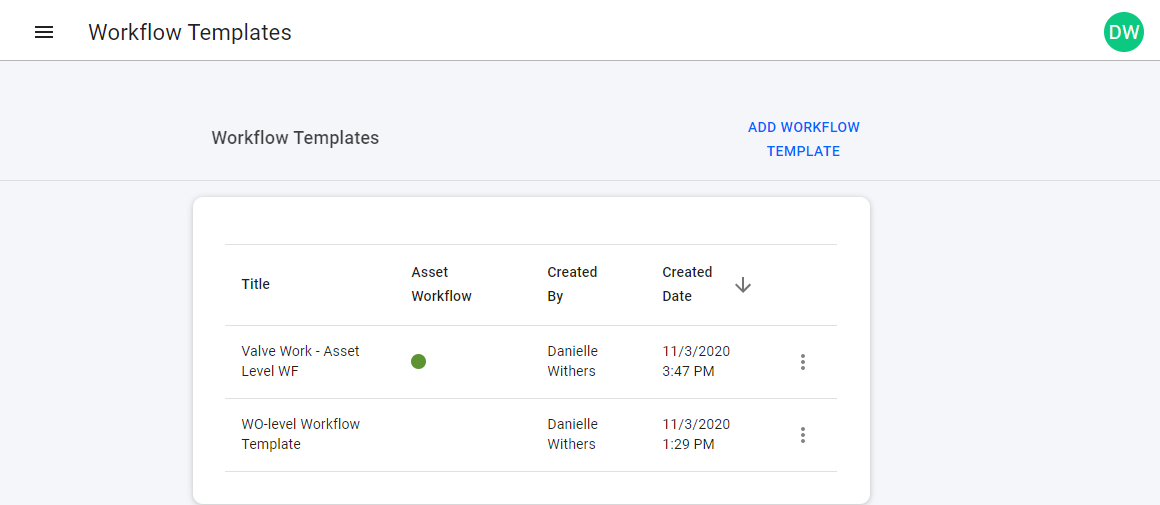
If you look at the Workflow Definition section of the App Builder, you can see that the workflow template is available in the list of Custom workflows. The workflow diagram is represented as it was drawn to allow you to confirm that you have selected the correct template.
You can create and manage a workflow template for asset-level workflows that can be used when building apps in Trimble Unity to meet your specific work process. These workflows are mainly used for asset-based workflows like asset inspections or repair activities.
TIP: See the How to Create an Asset-Level Workflow Template in Trimble Unity article on the Trimble Water community site for a video demonstrating how to create an asset-level workflow.
- Open the menu.
- Select App Builder.
- Select Create Workflow Template in the Workflow Templates section.
NOTE: If you want to update an existing template, click Manage. From the Workflow Templates page, find the template you want to edit, click the vertical three dots, and click Edit.
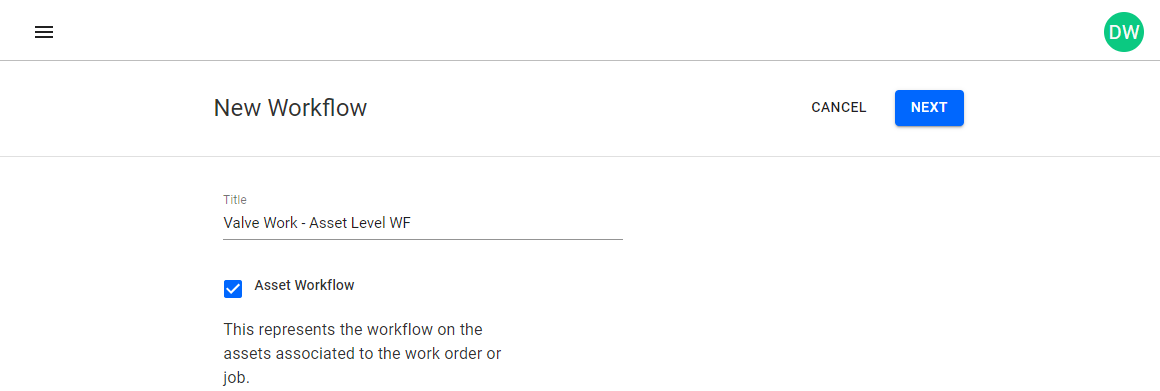
The New Workflow page opens.
- Enter a name for the template in the Title field.
- Select the Asset Workflow check box to associate an asset-level template with an asset.
- Click Next.
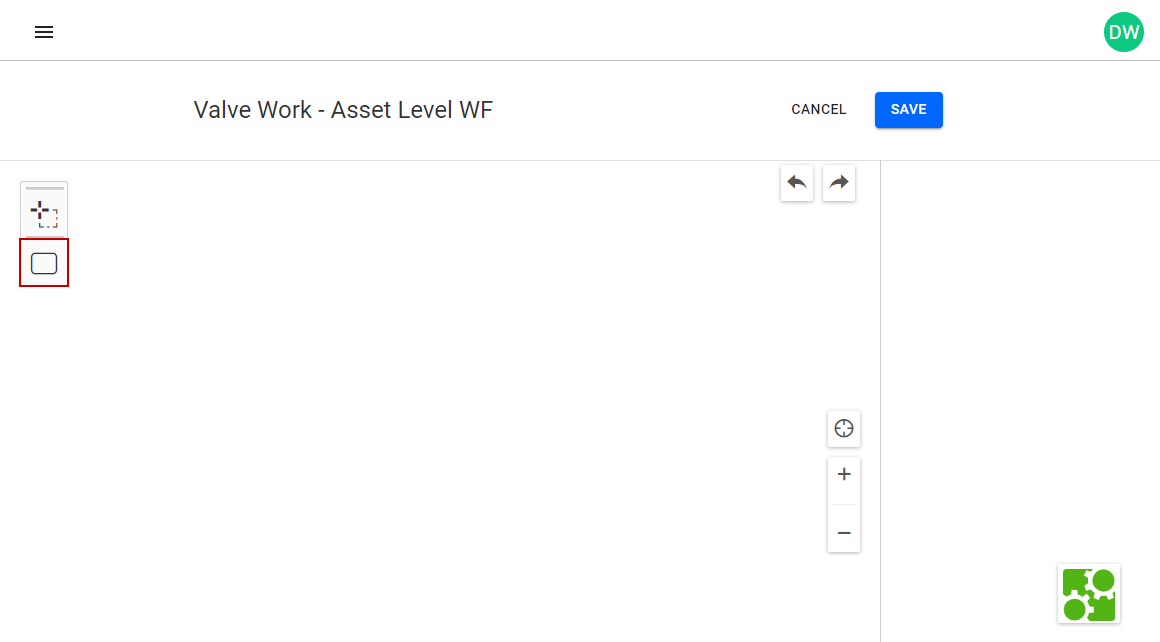
The next page allows you to build out the workflow by drawing the workflow process and progression on a canvas.
- Click Add Status from the menu on the left to add a box to the canvas.
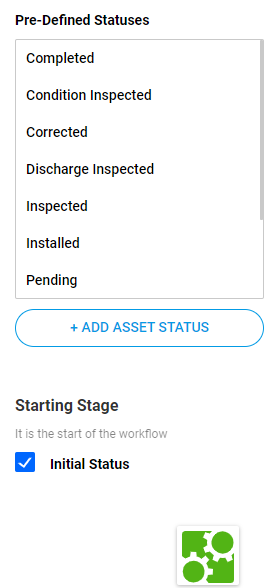
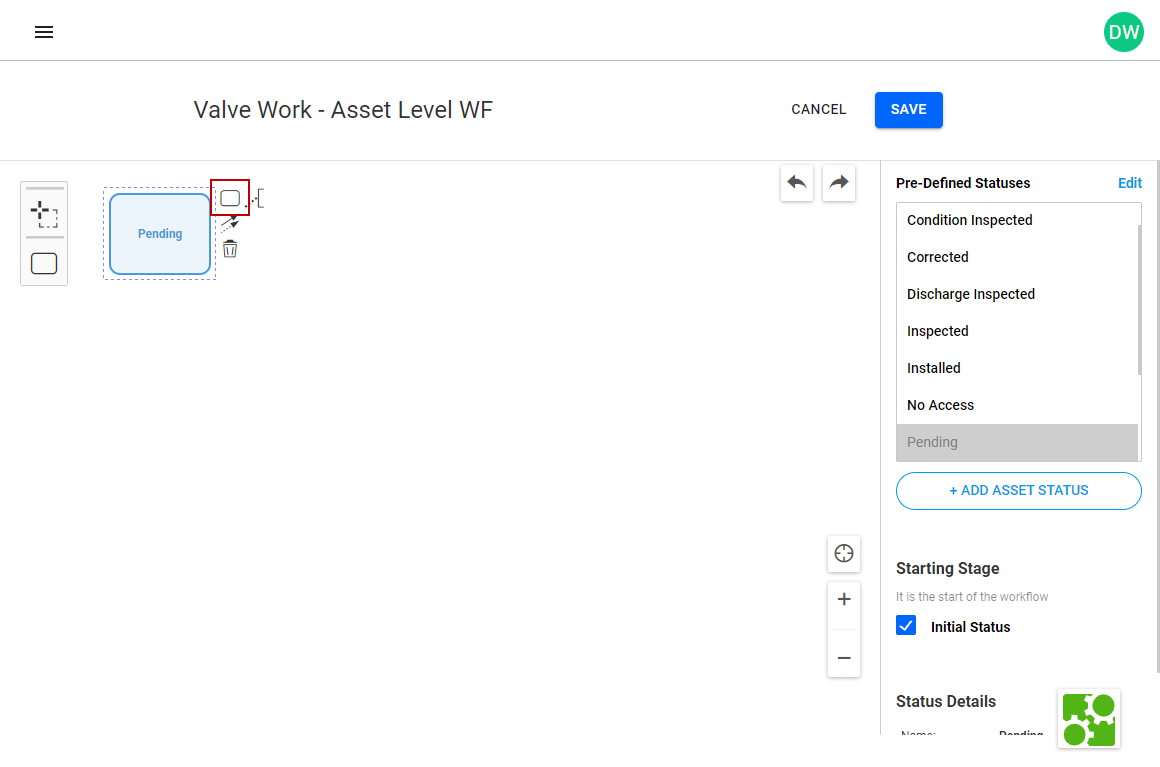
- Provide a name for the status by selecting the status box you added and selecting a status from the Pre-Defined Statuses panel.
- If the status you want already exists, select it.
- If the status you want is not in the list, click Add Asset Status. Fill out the New Asset Status panel as needed and click Save.
NOTE: In addition to entering a Name, you must select a Stage for the status as this has an effect on the color coding of the status interface. The Stage is also used as a validation check when completing a form to ensure all assets are completed or end state.
Selecting a status updates the status box on the canvas with the name of the status. You can add follow up statuses that allows the workflow template to progress from the beginning of the workflow to the end. You can add additional statuses using different tools shown in the following screenshot.
- Add Status: Click to add a new status box.
- Append Status: Click to create a new status box and connecting to the previous status box, which shows the workflow's progression.
- Append TextAnnotation: Click to attach text that explains the status.
- Append Actions: Click to connect the status box to another status box. This is especially useful if you used Add Status to create a status box and need to create a connection with another status box.
- Remove: Click to remove the status box, connections, or text annotations from the workflow.
- Activate the lasso tool: Click to select a group of statuses, connections, and/or text annotations and move them around on the canvas.
The easiest way to add statuses and connections between existing statuses in the workflow is to use Append Status.
- Click or click and drag Append Status on the existing status box to create a new status box. An arrow appears between the statuses and shows the workflow progression path.
TIP: When you click and drag, you can decide how much space is between the status boxes. However, if you just click Append Status, you can click an drag the new status box to change the default space between the status boxes.
- Provide a name for the status by selecting the status box you added and selecting a status from the Pre-Defined Statuses panel.
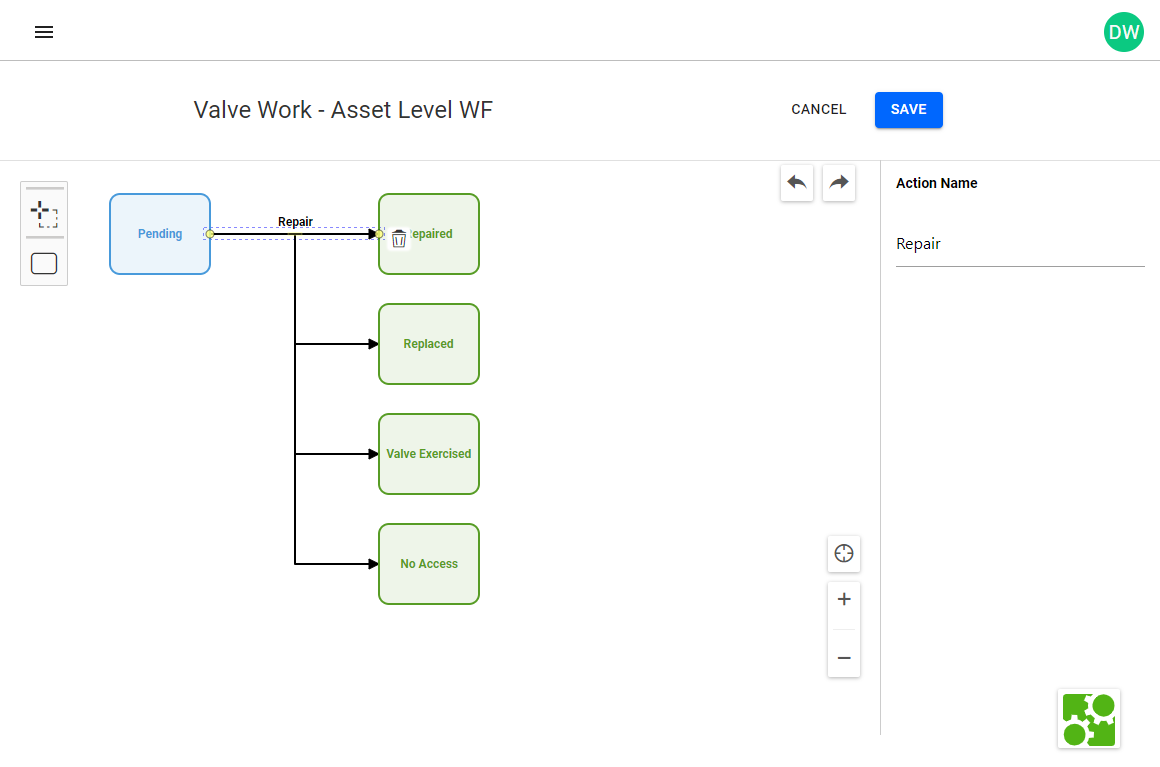
Once you have finished building the basic status workflow, you can add the names of the actions. The actions are what appear on the mobile and web interface as buttons, which are selected to trigger the transition from one status to the next status. For example, the action to trigger the status Repaired would be Repair.
- Select the arrow between statuses.
- Enter the Action Name.
The action name appears as a label on the arrow. You may need to adjust the location of the label to make it more readable.
- Repeat the previous steps for all the arrows in the workflow.
- Once you've completed adding the actions, click Save.
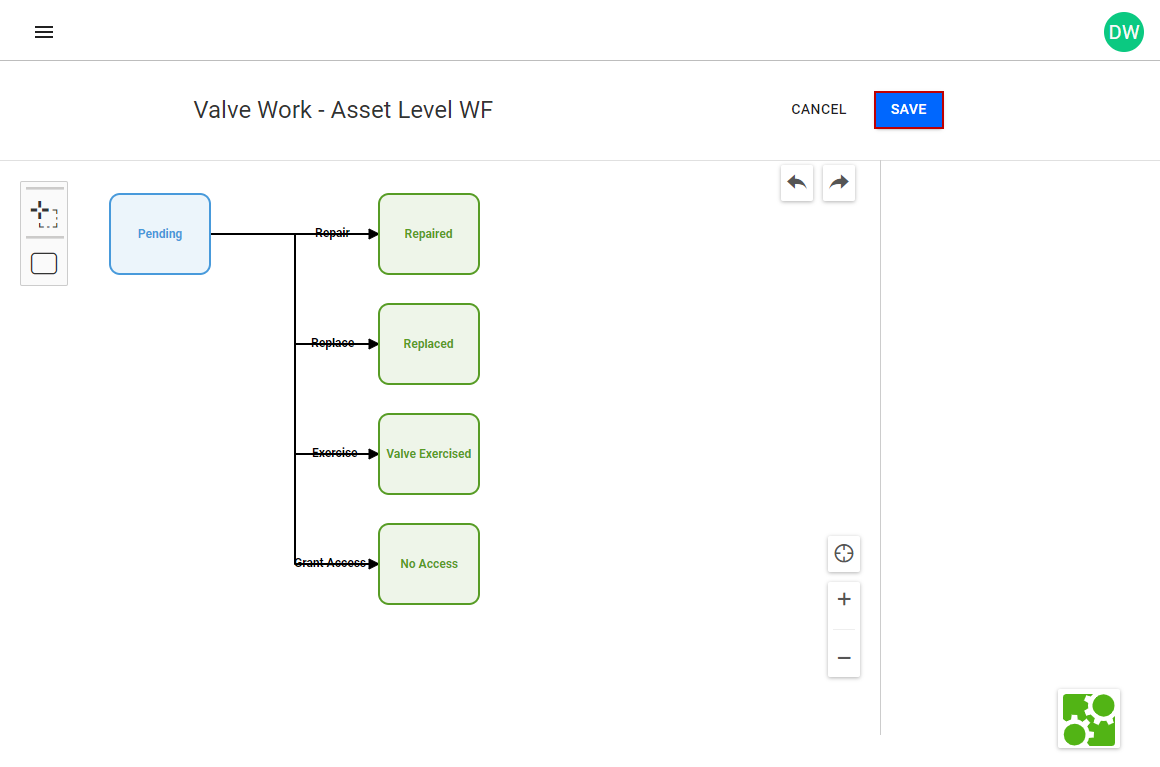
- A success message appears. Click OK.
The new workflow template appears in the list on the Workflow Templates page.
If you look at the Workflow Definition section of the App Builder, you can see that the workflow template is available in the list of Asset workflows. The workflow diagram is represented as it was drawn to allow you to confirm that you have selected the correct template.